Create your first survey
Design a form, publish it, and watch answers land in a live dataset, one column per question, with the location answer as point geometry.
Creating and publishing a survey requires the Editor role or higher. Putting the form on the open web additionally requires Publisher or Admin.
Create the survey
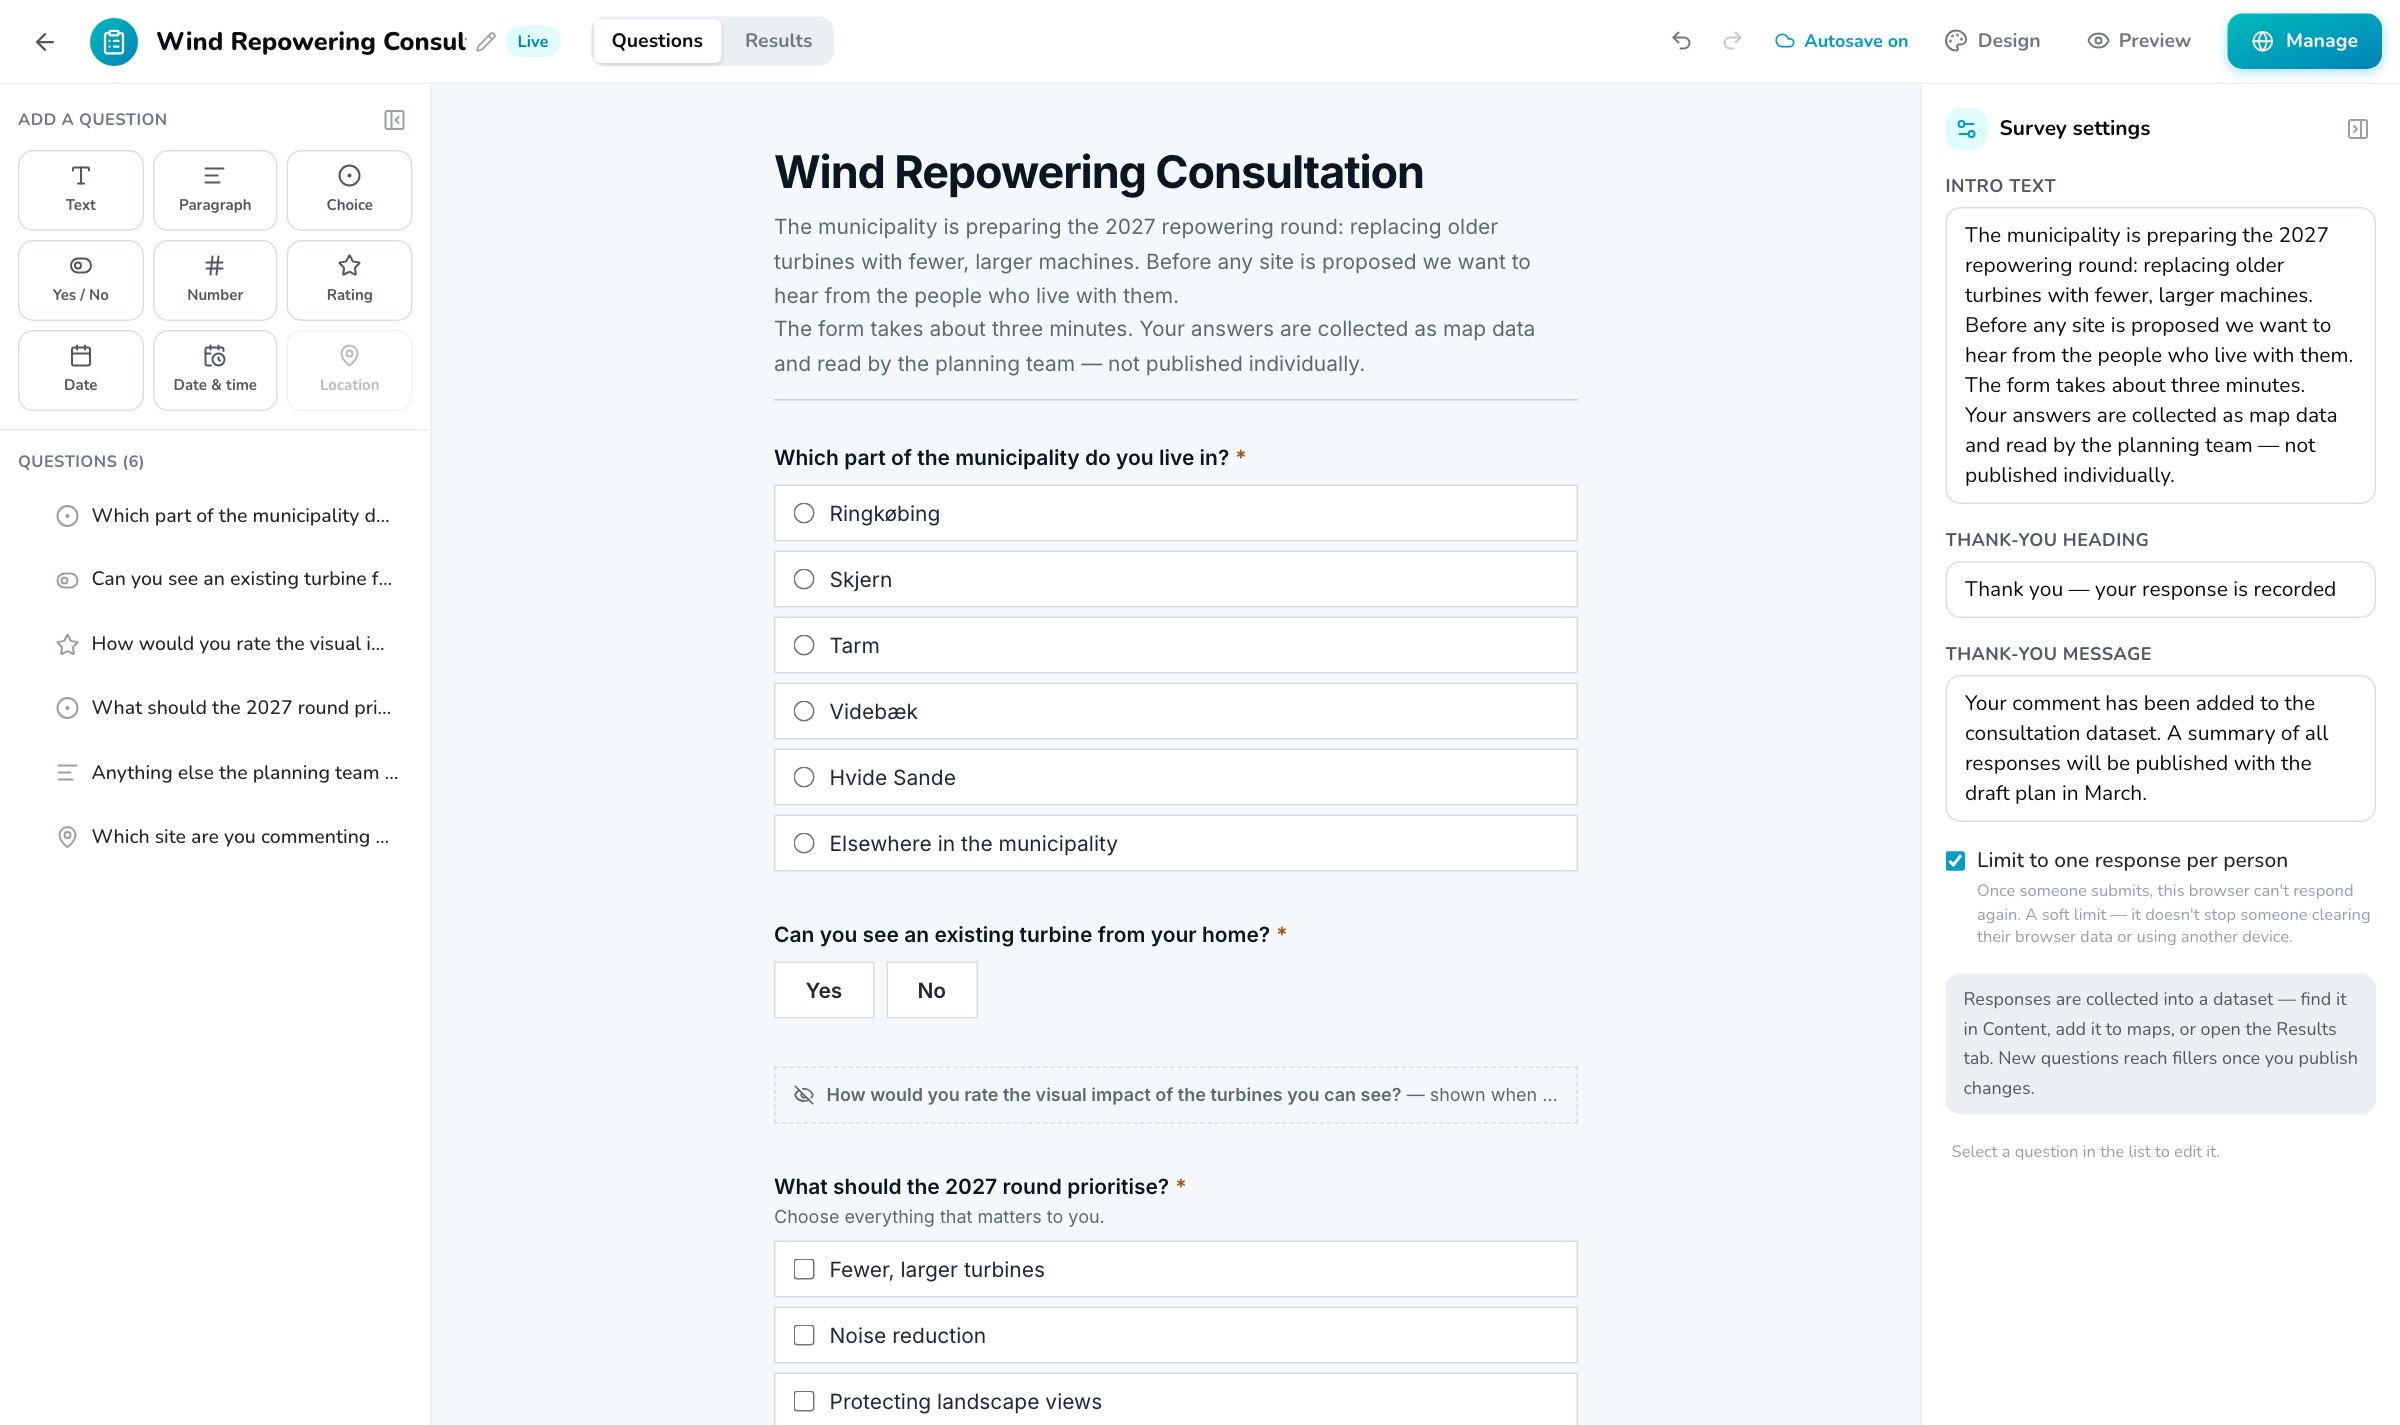
Open Apps → Surveys and press New survey. There is no template picker, you land straight in the builder with an empty form. Rename it from the title in the header.
Add questions
Click a type in Add a question: Text, Paragraph, Choice, Yes / No, Number, Rating, Date, Date & time or Location. Each one appears in the live form in the middle; drag rows in the question list to reorder.
Fill in the question settings
Select a question to edit it on the right: the wording, optional Help text and a Required checkbox. Choice questions take their options one per line, with Allow multiple selections and Show as dropdown. Number questions take a minimum and maximum; ratings take a 2–10 star scale.
Add the location question
A survey may hold one Location question. Choose how respondents answer, map only, address search only, or search and map together, and what the picker shows behind the pin: a built-in basemap or one of your own web maps.
Hide a question until it is relevant
Under Visibility, tick Show only when a previous answer matches and point it at an earlier Choice or Yes/No question. In the builder the hidden question shows as a dashed stub so you can still see where it sits.
Write the framing text
With no question selected, the right panel becomes Survey settings: an Intro text shown above the first question, the Thank-you heading and message, and a soft Limit to one response per person.
Publish the survey
Press Publish → Publish survey. This creates the response dataset, one column per question, the location answer as point geometry, and gives you an organization fill link every signed-in member can use. The question structure locks at this point: wording, help text and visibility stay editable, answer options and types do not.
Open it to the public (optional)
In the same sidesheet, Publish to web puts an anonymous form on
your-org.orbgis.se/your-surveywith a QR code. You can take the web form down without closing the survey, and close the survey without deleting anything.
What you get back#
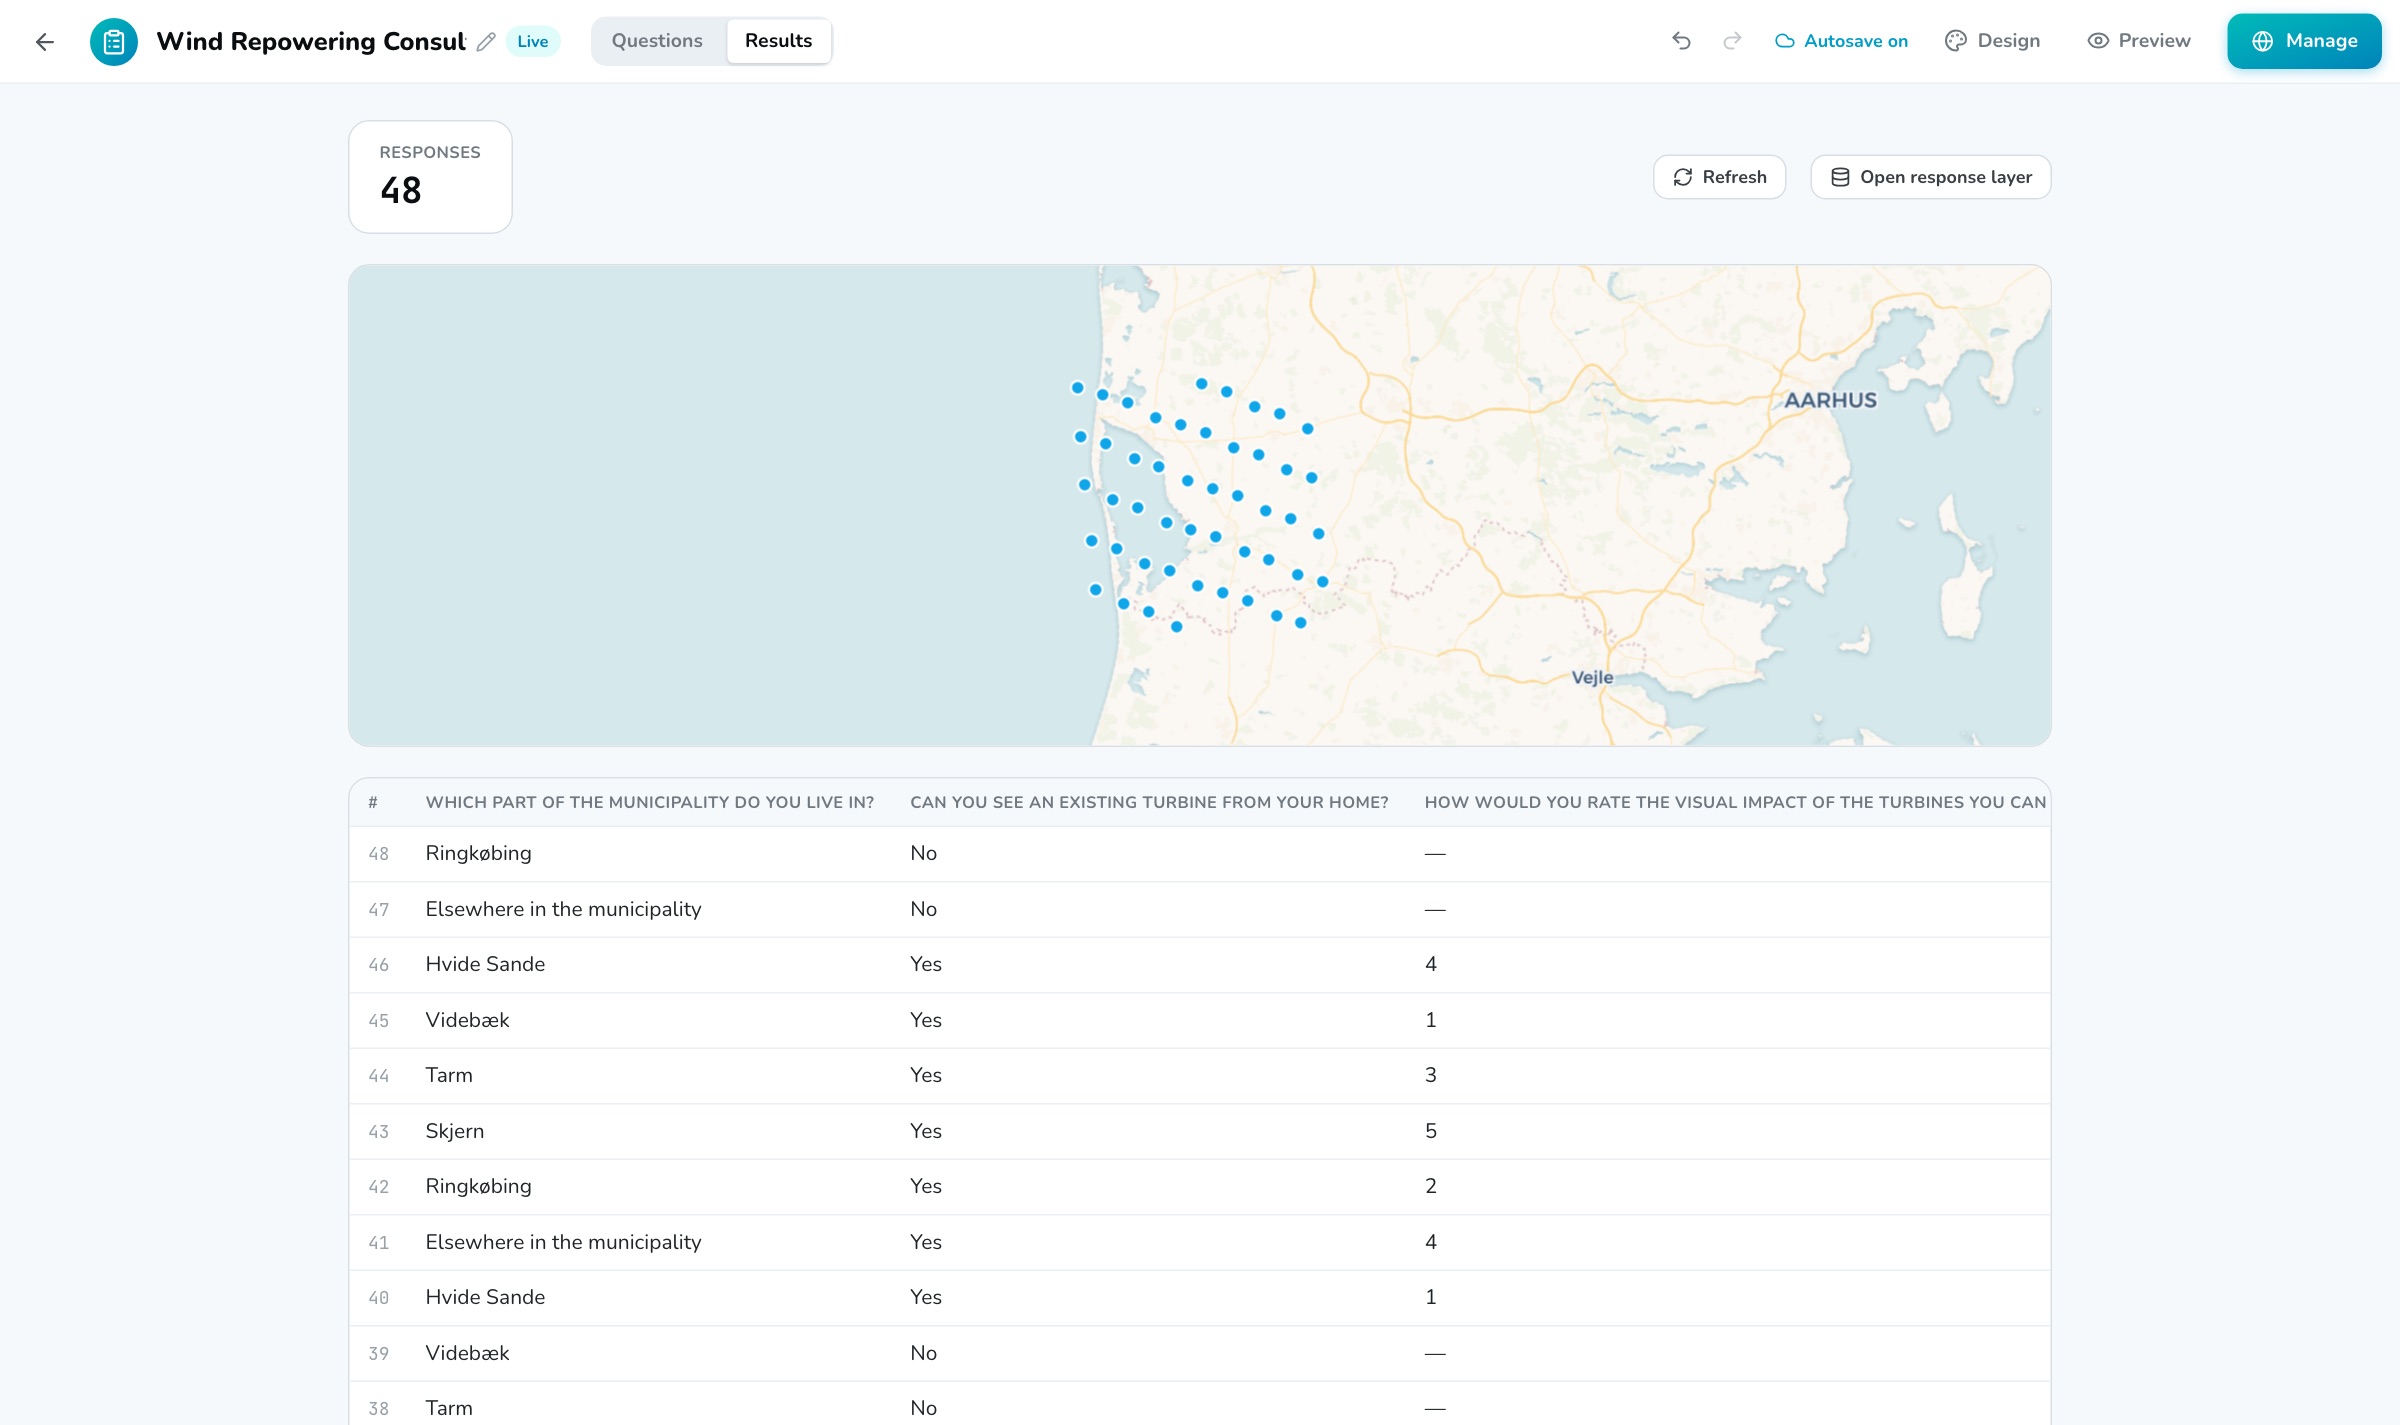
Responses are ordinary OrbGIS data. The dataset is called “{your survey}, Responses” and appears in the portal like any other layer: add it to a map, chart it in a dashboard, or open it in the Data Editor. The Results tab inside the editor gives you a live count, a mini-map of the latest points and a paged answer table without leaving the survey.
Adding questions after launch#
New questions added to a live survey are marked New and stay invisible to respondents until you press Publish new questions, that adds the matching columns to the response dataset first, so no answer can arrive without somewhere to land.
A survey can hold up to 50 questions plus one location question. The full reference, every question type, the two publish stages and how the response layer is built, is in Surveys.